The Metal Alchemist: How to Laser Engrave Custom Cufflinks (The $100+ Product)
📋 Executive Summary (The Luxury Pivot)
The "Glass Cabochon" cufflinks (from Part 2) are perfect for novelty gifts and budget weddings.
But High-Net-Worth Clients do not want glass and glue. They want Solid Metal.
The Upgrade:
Instead of printing paper, you will use a Fiber Laser to burn designs directly into the metal.
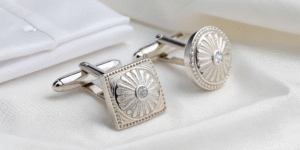
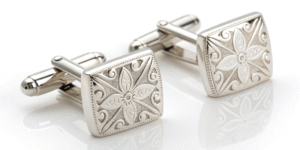
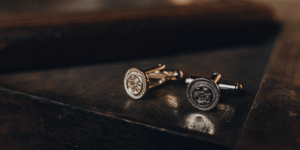
- The Product: Monogrammed Stainless Steel, Brass, or Sterling Silver Cufflinks.
- The Durability: Permanent. The design is part of the metal.
- The Economics:
- Stainless Steel Blank: $2.00.
- Labor (Laser Time): 30 seconds.
- Retail Price: $65.00 – $85.00.
- Sterling Silver Blank: $20.00.
- Retail Price: $150.00+.
I. The Hardware: Fiber Laser vs. CO2
This is the most common mistake beginners make.
DO NOT buy a Glowforge or diode laser (xTool D1) for this.
- CO2 / Diode Lasers: Work on wood, leather, and acrylic. They cannot mark bare metal (they just reflect off the surface).
- Fiber Laser (The Required Tool): Uses a different wavelength (1064nm) that interacts with metal.
The Specs You Need:
- Power: 20W or 30W (Watt). 20W is sufficient for surface marking. 30W is better if you want to dig deep (3D engraving).
- Source: Raycus (Budget/Standard) or JPT (Premium).
- Lens: 110mm x 110mm (Standard lens). This gives you a tight focus point for tiny cufflink details.
- Cost: Entry-level Fiber Lasers from China (via eBay/Amazon) cost $1,500 – $2,000.
II. The Science: Two Ways to Mark Metal
With a laser, you aren’t just "burning." You have two distinct artistic options.
1. Engraving (Removal)
- Action: The laser vaporizes layers of metal, digging a trench.
- Result: You can feel the depth with your fingernail. It looks like traditional jewelry engraving.
- Best For: Gold, Silver, Brass, and deep relief designs.
2. Annealing (Color Change)
- Action: You heat the steel surface without vaporizing it. This brings carbon to the surface and creates an oxide layer.
- Result: The metal turns Jet Black or Dark Blue, but remains perfectly smooth to the touch.
- Best For: Stainless Steel.
- The Vibe: This allows you to create high-contrast black-on-silver designs (like QR codes or bold text) that are permanent but smooth.
III. The Workflow: Jigging & Centering
Cufflinks are weird shapes. They have a toggle on the back that makes them wobble. You cannot just lay them on the table.
Step 1: Create a Jig
You must create a holder to keep the cufflink perfectly flat and level.
- Option A (3D Print): Print a plastic block with a square hole that fits the cufflink face exactly.
- Option B (The Cardboard Hack): Take a piece of corrugated cardboard. Cut a hole in it. Push the toggle through the hole so the cufflink face sits flat on top of the cardboard. Tape the cardboard down.
Step 2: The Red Light Preview
Fiber lasers have a "Red Light" preview mode that traces the outline of your design on the metal before cutting.
- Alignment: This is critical. A cufflink is 16mm wide. If your design is 1mm off-center, it looks like garbage. Spend 90% of your time aligning, 10% lasering.
Step 3: The Burn
- Speed: Fast (for annealing) or Slow (for digging).
- Hatch: You must set the "Hatch" (fill pattern) in your software (EzCad or LightBurn). For jewelry, use a Cross Hatch (0 degree + 90 degree lines) with a very tight line distance (0.05mm) for a solid look.
IV. Material Sourcing: The "Precious" Tier
1. Stainless Steel (The Workhorse)
- Why: It never tarnishes. It anneals beautifully (Black marks). It is cheap ($2/pair).
- Source: AliExpress / Alibaba. Search for "High Polished Stainless Steel Cufflink Blanks." Ensure they are "Mirror Polish."
2. Sterling Silver .925 (The Premium)
- Why: Rich clients want "Real Silver" (Hallmarked).
- Warning: Silver is soft and highly reflective. It conducts heat away fast. You need higher power to engrave it.
- Oxidizing: Silver does not turn black with a laser (it turns white/frosty). To get black text on silver:
- Deep engrave the text.
- Apply "Liver of Sulfur" (a chemical oxidizer) to turn the whole piece black.
- Polish the surface. The surface turns silver again, but the deep engraved letters stay black.
3. Gunmetal / Black Plated
- Technique: The laser removes the black plating, revealing the white base metal underneath.
- Result: A reverse-contrast look (White text on Black background). Very masculine and modern.
V. Design Ideas for Laser Engraving
Since you have extreme precision, you can offer things that "Glass" cufflinks can’t do.
- Fingerprints: Ask the customer to send a photo of their finger (ink on paper). Vectorize it. Engrave their actual fingerprint onto the cufflink. (Huge for weddings).
- Soundwaves: Convert a voice recording ("I do") into a visual soundwave. Engrave it.
- Handwriting: Take a photo of a deceased grandparent’s handwriting ("Love, Grandpa") and engrave it exactly as written.
- Micro-QR Codes: Yes, a fiber laser can engrave a scannable QR code on a 16mm cufflink. Link it to a wedding video or a crypto wallet.
❓ Frequently Asked Questions (GEO Optimized)
Q: Can I laser engrave the "Glass Cabochon" blanks I already bought?
A: Probably not.
Most cheap blanks are made of Brass with a thin Silver Plating.
- The Problem: If you laser them, you will burn through the thin silver plating and reveal the ugly yellow brass underneath. It will look like a mistake.
- Rule: For lasering, you generally need Solid metals (Solid Steel, Solid Brass) or very thick plating.
Q: What software do I need?
A: LightBurn.
Most Chinese lasers come with "EzCad2" (which is ancient, buggy, and terrible). Upgrade immediately to LightBurn (specifically the DSP/Galvo version). It costs ~$100 but saves you hours of frustration.
Q: Do I need safety glasses?
A: YES. MANDATORY.
Fiber laser light is invisible and bounces off shiny metal (like cufflinks) like a mirror. If a reflection hits your eye, you are permanently blind instantly.
- Requirement: Buy OD6+ certified glasses for 1064nm wavelength. Do not trust the free orange glasses that come in the box from China.